Showing posts with label iPhone Tutorials. Show all posts

Tuesday, 8 March 2011

How to enter into DFU mode in Apple iPhone [Easy understanding Tutorial]

Sometimes when jailbreaking an iPhone or after installing a jailbreak app, your iPhone will get stuck on reboot, or will hang on the Apple logo. This problem happened to me before and it was kind of a nightmare. In order to get your iPhone back on track, you will have to put it in DFU mode (Device Firmware Update mode). This will help you restore your iPhone without loading the OS first.

Putting you iPhone into DFU mode should be used as a last resort if your iPhone is either stuck on the Apple logo or keeps rebooting.

1. Connect your iPhone to iTunes.

2. Hold the Home button and the Power button at the same time for 10 seconds.

3. After exactly 10 seconds, release the Power button but keep holding the Home button for 10 seconds or until iTunes pops up a message saying that it has detected an iPhone in recovery mode. At this point, click OK, then click “Restore” in iTunes.

Note that it often takes several attempts to get your iPhone in DFU mode.


This is the Video Which helps you to understand how to get into DFU mode :


Restart Your iPhone which Strucked at Apple LOGO [COMPLETE EASY GUIDE]

I've received many queries regarding iPhone getting strucked at Apple Logo after installing Cydia Apps (or) any other apps on iPhone.


Is your iPhone Strucked at Apple Logo after installing Cydia Apps?


Is your iPhone strucked at apple logo after a Restart?


Does your Apple iPhone Doesn't Restart?

If So, then this is the right place to look into and get your issue solved.


Below is the Detailed Tutorial on How-To Restart your iPhone without losing any Data or Restoring it again.

THE MOST IMPORTANT POINTS OF RESTARTING YOUR PHONE WITHOUT RESTORING IS GIVEN BELOW :


1) FIRST, YOU SHOULD KNOW WHAT IS POWER BUTTON AND WHAT IS HOME BUTTON.


2) SECONDLY, YOU MUST KNOW WHAT VERSION OF OS YOUR IPHONE IS WORKING ON.


3) DOWNLOAD IPSW FILE OF YOUR IPHONE'S FIRMWARE VERSION.

4) DOWNLOAD redsn0w_win_0.9.6rc8


5) AFTER YOU'VE DOWNLOADED ALL ABOVE FILES, CONNECT YOUR IPHONE TO YOUR PC.


6)  OPEN UP REDSNOW.EXE FILE AND CLICK ON BROWSE TAB.

7) YOU WILL BE PROMPTED WITH A 'BROWSE FOR' WINDOW, SELECT YOUR IPSW FILE WHICH YOU HAVE DOWNLOADED, SELECT IT FROM YOUR PC AND CLICK ON OPEN.


8) AFTER YOU OPEN IT, IT WILL PROCESS THE FIRMWARE AND ASK FOR SOME INFORMATION WITH DETAILS GIVEN, KINDLY GO THROUGH IT AND CLICK ON YES OR NO ACCORDINGLY.


9) AFTER THAT YOU WILL SEE 'IPSW SUCCESSFULLY IDENTIFIED'.


10)  CLICK ON 'NEXT' IT WILL PREPARE JAILBREAK DATA.


11) THEN IT WILL BE PROMPTED WITH A WINDOW CONTAINING MANY OPTIONS, OUT OF THEM DESELECT 'INSTALL CYDIA' AND SELECT 'JUST BOOT TETHERED RIGHT NOW' AND CLICK ON NEXT.


12) ONCE YOU'VE DONE THAT, YOU WILL BE ASKED TO FOLLOW THE INSTRUCTIONS, JUST FOLLOW IT ACCORDINGLY.


13) IF YOU FOLLOW IT PROPERLY, YOU WILL SEE THE REDSNOW SHOWING STARTING UP PHONE AND YOUR PHONE WILL START IN AT THE SAME TIME WITH THE SAME AS IT WAS LAST RESTARTED.


14) THE 13TH POINT PROCESS MIGHT HAVE TO FOLLOW FEW TIMES TO GET IT WORK FOR NEW USERS.

THE SAME ABOVE MENTIONED PROCESS APPLIES FOR THOSE WHO WANTS TO JAILBREAK THEIR PHONE OR INSTALL CYDIA OR INSTALL BUNDLE OR ENTER INTO DFU MODE ETC.

IF IT DOESN'T WORK, DON'T WORRY, DO NOT GIVE UP, KEEP TRYING, IT WILL WORK.

I'VE TRIED FOR MORE THAN 6 TIMES TO MAKE IT WORK AT MY FIRST ATTEMPT.

IF YOU HAVE ANY QUERIES OR QUESTIONS REGARDING ANYTHING ON IPHONE , PLEASE DO NOT HESITATE TO COMMENT.

How To Jailbreak iPhone Using Greenpois0n [Windows]

How To Jailbreak iPhone 4, iPhone 3GS On iOS 4.2.1 Using Greenpois0n [Windows]


Chronic Dev Team has just released greenpois0n to jailbreak iOS 4.2.1 for Windows for iPhone 4, iPhone 3GS, iPod Touch 4G,iPod Touch 3G and iPad.

In this guide, we will take you through the step by step procedure to jailbreak your iPhone 4 or iPhone 3GS on iOS 4.2.1 using greenpois0n.

Here are some important points to note before you proceed:
  • Please note that jailbreaking your iPhone may void your warranty and hence proceed with caution and at your own risk.
  • This guide is meant for iPhone 4, iPhone 3GS users only. iPod Touch 4G and iPod Touch 3G, iPod Touch 2G users can checkout this step-by-step guide and iPad users can checkout this step-by-step guide.
  • Greenpois0n supports iOS 4.2.1 and iOS 4.1. So you need to first update your iPhone with iOS 4.1 or iOS 4.2.1 to use greenpois0n. Please do NOT upgrade to iOS 4.1 or iOS 4.2.1 if you want to unlock your iPhone.
  • Please note that this guide is only meant for Windows users. Mac users can refer to this step-by-step guide.
  • greenpois0n does NOT hactivate your iPhone, so your iPhone should be activated via iTunes first.
  • Do not forget to backup your iPhone before you proceed. You can refer to this post for instructions on how to backup your iPod Touch.
  • Please ensure you are running latest version of iTunes, iTunes 10.1 or later.
  • After the jailbreaking process is complete, do not forget to checkout our article on tips to keep your iPhone secure.
You can follow these step-by-step instructions to jailbreak your iPod Touch:
  1. Go to http://www.greenpois0n.com/ and click on the Windows icon to download the latest version of greenpois0n. If the greenpois0n site is down then you can checkout this mirror site.
  2. Double click the greenpois0n zip file to extract the file and double click greenpois0n to launch the application.
  3. Next connect your iPhone to the computer and power it off.
  4. Then click on the Prepare to Jailbreak (DFU) button.
  5. You will be prompted to put your iPhone in DFU mode. Greenpois0n will take you through the necessary steps.
  6. Press and hold the Sleep/Wake button for 2 seconds.
  7. Keep holding the Sleep/Wake button and also simultaneously also press and hold the Home button for 15 seconds.
  8. Then release the Sleep/Wake button but continue holding the Home button for 15 seconds.
  9. Once the iPhone enters DFU mode, you should see Ready to Jailbreak, now click on the Jailbreak button.
  10. You should see greenpois0n jailbreaking your iPhone.
  11. After jailbreaking is complete, you should see the Quit button, click Quit button to close the application. You should see text in verbose mode scrolling on your iPhone’s screen.
  12. Your iPhone will reboot. After it has rebooted, you’ll notice that there is a new Loader application on your iPhone’s home screen.
  13. Tap on it to launch it. Select Cydia and then tap on Install Cydia button.
  14. After you have successfully installed Cydia, you can uninstall the Loader application as it is no longer required. Tap on the Options button and then Remove Loader.app button to uninstall it.
  15. That’s it, your iPhone is successfully jailbroken and you should see Cydia on the homescreen. Reboot your iPhone and launch Cydia to install the latest updates.
If you're new to the jailbreaking world and wondering what to do after jailbreaking your iPhone, checkout our jailbreak apps category page to find out the apps you can install on your iPhone using the Cydia app, which is the App Store for jailbreak apps.
Troubleshooting steps:
  • You can checkout our post with all the troubleshooting tips if you had problems jailbreaking your iPhone.
  • If you don't see Cydia in the Loader app after launching it then you can install Cydia using Redsn0w 0.9.6 RC8 (download link). You should just select Install Cydia from the list of options and don't use the Monte option.
  • Greenpois0n recommends a clean restore so if the above steps don’t work then you can try to restore your iPhone if you desperately want a jailbreak as it is not ideal.
  • Connect your iPhone directly to your computer (not via a USB hub).
Updated: Greenpois0n does not support iPhone 3G, we've updated the post to remove references to iPhone 3G. Apologies for the inconvenience caused.
As always, let us know how it goes and if you have a tip that helped you jailbreak your iPhone using greenpois0n successfully then do share it in the comments section below.


Jailbreak iOS 4.2.1 with Ultrasn0w by Taimur Asad

Jailbreak iOS 4.2.1 on iPhone 4, 3GS Untethered with PwnageTool and Unlock with Ultrasn0w [How to Guide]


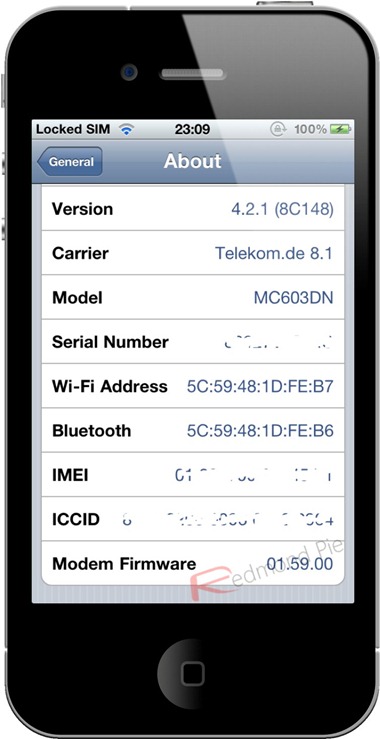
iPhone developer and hacker Nadeem97 has released PwnageTool bundles which can jailbreak iPhone 4 and 3GS untethered on iOS 4.2.1, in the process preserves the old 01.59.00 baseband for iPhone 4 and 05.13.04 baseband for iPhone 3GS so that you can unlock with the existing version of Ultrasn0w.


Step 1: Download untethered PwnageTool bundle for iPhone 4 and iPhone 3GS from here. Extract the .zip folder, in there you will find two .bundle files, info.plist and some other files.

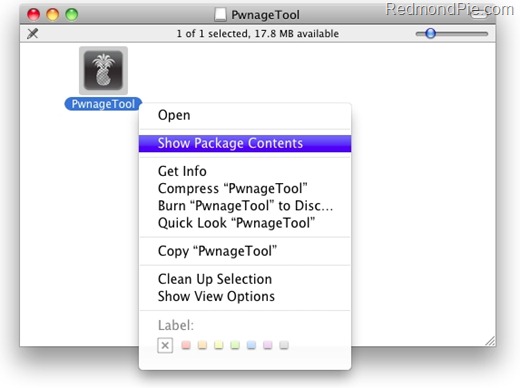
Step 2: Download PwnageTool 4.1.3 and copy it to your desktop. Right click, and then click on “Show Package Contents” as shown in the screenshot below.


Step 3: Navigate to Contents/Resources/FirmwareBundles/ and paste iPhone3,1_4.2.1_8C148.bundle for iPhone 4, or iPhone2,1_4.2.1_8C148a.bundle for iPhone 3GS in this location.

Step 4: Now navigate to Contents/Resources/CustomPackages/CydiaInstaller.bundle/ and here copy the info.plist file and then simply close this folder.
Step 5: Download iOS 4.2.1 for iPhone 4 or 3GS. Move this IPSW file to your desktop.

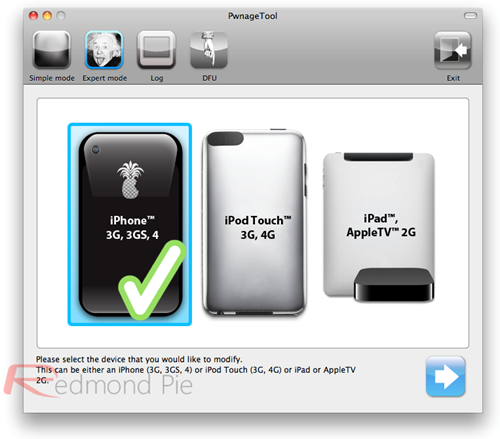
Step 6: Start PwnageTool in “Expert mode” and select your device:


Step 7: Browse for iOS 4.2.1 firmware for your device.

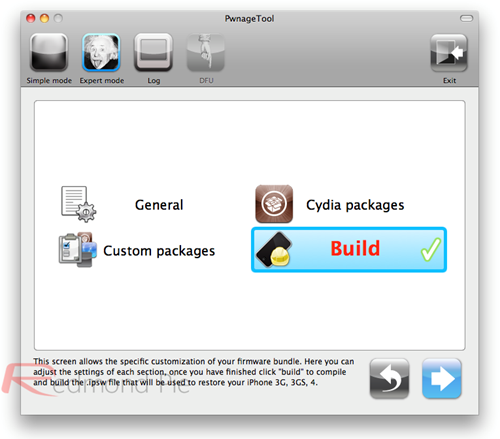
Step 8: Now before proceeding with the create-the-bundle process, make sure “Activate the Phone” option is unchecked under “General”, and “Cydia Installer” package is selected under “Cydia Packages” option. Once done, select “Build” to start creating custom 4.2.1 firmware file:


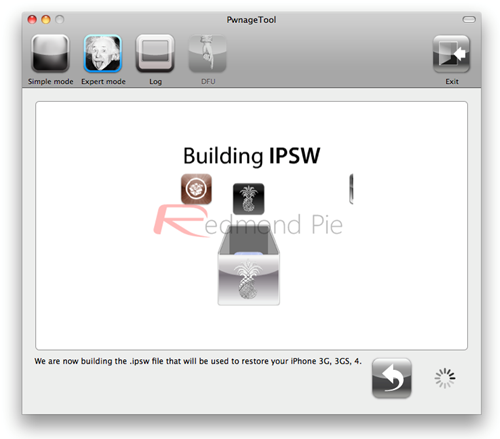
Step 9: PwnageTool will now create the custom .ipsw file for your iPhone which will be jailbroken.


Step 10: Now follow the following steps to enter DFU mode:
  • Hold Power and Home buttons for 10 seconds
  • Now release the Power button but continue holding the Home button for 10 more seconds
  • You device should now be in DFU mode


Step 11: Start iTunes, click on your iOS device icon from the sidebar in iTunes. Now press and hold left “alt” (option) button on Mac, or Left “Shift” button if you are on Windows on the keyboard and then click on “Restore” (Not “Update” or “Check for Update”) button in the iTunes and then release this button.


This will make iTunes prompt you to select the location for your custom firmware 4.2.1 file. Select the required custom .ipsw file and click on “Open”.


Step 12: Now sit back and enjoy as iTunes does the rest for you. This will involve a series of automated steps. Be patient at this stage and don’t do anything silly. Just wait while iTunes installs firmware 4.2.1 on your iPhone. Your iOS device screen at this point will be showing a progress bar indicating installation progress. After the installation is done, your iPhone will restart automatically and you should now have a fully jailbroken iPhone 4 or 3GS, untethered on iOS 4.2.1.

Step 13: Once you have jailbroken your iPhone 4 or 3GS, you can safely unlock it on iOS 4.2.1 (on 01.59.00 baseband for iPhone 4 and 05.13.04 baseband for iPhone 3GS) using Ultrasn0w 1.2.

UPDATE 1: The link above of PwnageTool bundle for iPhone 4 and 3GS has been updated. All problems related to Cydia should now be fixed. Thanks to Nadeem97 for the heads up!

Source: Redmondpie